Step 4: Connecting the Shapes
To connect the shapes:
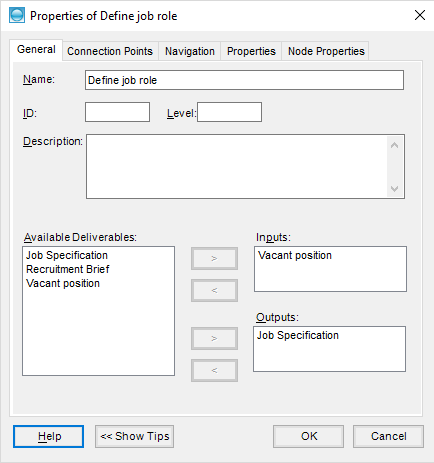
- Right click on the Define job role shape.
- Select Properties from the context menu.
- In the Available Deliverables box, select Vacant Position and add it to the Inputs box using the right arrow button.
- Now select Job specification and add it to the Outputs box using the right arrow button.
- Click on the OK button.
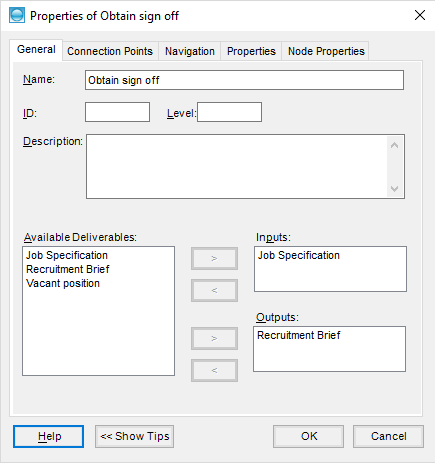
- Right click on the Obtain sign off Activity shape.
- Select Properties from the context menu.
- In the Available Deliverables box, select Job specification and add it to the Inputs box using the right arrow button.
- Now select Recruitment brief and add it to the Outputs box using the right arrow button.
- Click on the OK button.


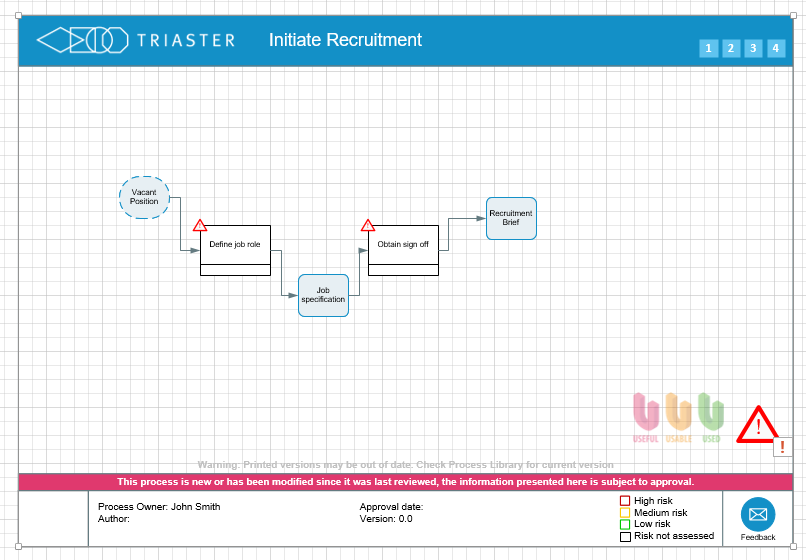
Your map should now look like this:

Check that the arrow heads are in the correct direction of flow and that each Activity is connected to its Inputs and Outputs.
Using manual connection methods
Process Navigator interprets any connector as a valid flow, so manually adding connectors is fine provided they are properly glued.
When manually adding connectors, they must begin at the Input and end at the Activity, or begin at the Activity and end at the Output. Process Navigator interprets direction of flow from the direction of connection, so you must be careful to get this right.
It is not sufficient to have arrowheads pointing in the right direction because arrowheads can be formatted to go against the flow.
Using multiple connection points
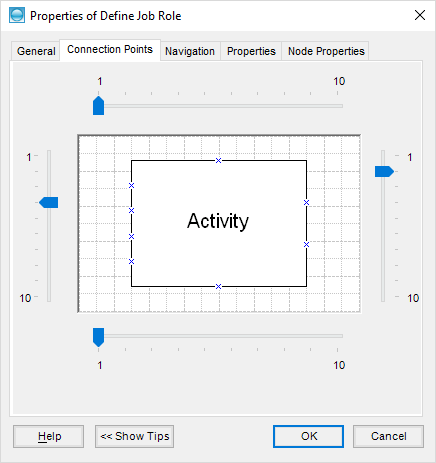
When the maps become more complicated and there is more than one deliverable being used or produced by an activity or a deliverable is used or created by more than one activity on a map, it might be useful to have more than one connection point.
To add more connection points:
- Right click the shape and select Properties.
- Click on the Connection Points tab.
- Move the sliders on any side to increase (or decrease) the number of connection points.
- Click OK.
- You can now manually move the ends of the connectors to the new connection points.
